In any construction project, the bathroom may be one of the smallest spaces, but it’s also one of the most technically demanding. Behind the finished tiles and fixtures lies a coordinated network of pipes, vents, and fittings that must be installed with precision. Inaccurate measurements or poor planning during the rough-in stage can lead to costly rework and delays and these issues that can be avoided with proper design coordination and adherence to code.
For BIM professionals and learners, understanding bathroom plumbing goes beyond knowing where each pipe goes. It’s about translating accurate design data into a build-ready layout, ensuring every connection, height, and slope is correct before work begins on site. This guide breaks down the general U.S. method for plumbing a bathroom, making it easier for learners and professionals to connect design concepts with real-world installation.
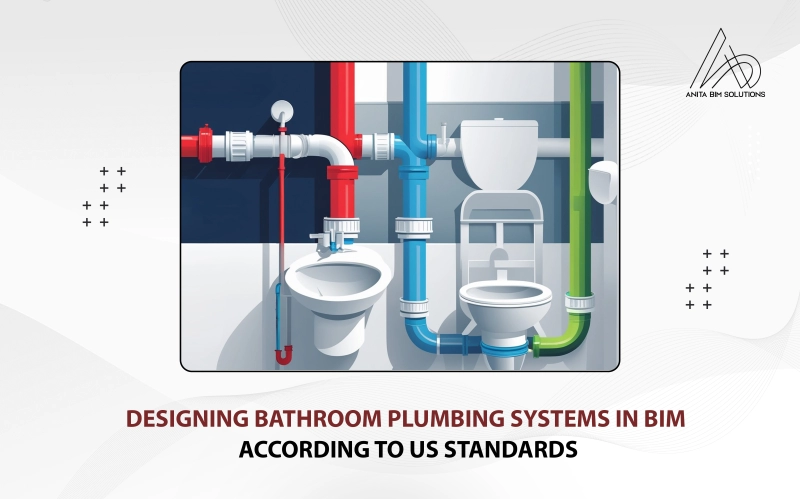
Before any pipes are installed, precise rough-in measurements are essential. In BIM, these values are usually embedded directly into the model so installers have an exact reference.
For the Toilet:
For the Lavatory (Sink):
Getting these measurements right in the BIM model ensures that on-site installers can follow a clear, accurate plan without guesswork.
The drainage system must be designed so both the toilet and the sink connect to the same main drain without disrupting each other’s flow. Under U.S. standards:
In a BIM workflow, the drainage route is planned in 3D, avoiding clashes with structural elements or other building services.
Venting is essential for any plumbing system. Without it, wastewater flow can be slowed by air locks or even pull water out of traps, leading to foul odours.
IPC (International Plumbing Code): 1.5 inches
UPC (Uniform Plumbing Code): 2 inches
In BIM, vents can be routed and visualised alongside other services to check for potential conflicts with beams, ductwork, or electrical runs.
For a compact bathroom, the lavatory vent can often be tied into the toilet vent using a sanitary tee. This ensures both fixtures are properly vented while reducing the total number of pipes through the roof.
BIM coordination at this stage helps confirm that vent lines are placed correctly and won’t interfere with ceiling spaces or wall framing.
5. Final Assembly and Cleanouts
Once the drainage and venting are planned and installed:
Bathroom plumbing design in BIM isn’t just about creating a neat 3D model rather, it’s about making sure every dimension, slope, and connection works in real life. BIM allows teams to:
In the BIM workflow, bathroom plumbing design isn’t just a technical step, it’s a crucial checkpoint that keeps the project moving without costly delays. When US standards are integrated early in the design stage, fixture locations, pipe slopes, and venting can be set with precision, reducing RFIs and speeding up approvals. This accuracy comes from understanding not just the codes, but how they apply in real project scenarios.
For those who want to gain this skill through hands-on experience, Anita BIM Solutions offers learning programmes that train you to work with US standards on live projects. It’s an opportunity to bridge the gap between theory and practice, ensuring you’re ready to design and coordinate with the same precision that top industry projects demand.