In the modern AEC (Architecture, Engineering, and Construction) industry, accuracy and detail are critical. Renovation, restoration, and retrofit projects often begin with an existing structure where traditional drawings are missing, outdated, or inaccurate. This is where Point Cloud to BIM (Scan to BIM) becomes a game-changer. By using laser scanning technology, professionals can capture millions of 3D data points that represent the actual conditions of a site. These points are then converted into a BIM model that can be used throughout the project lifecycle. Let’s take a real-life project example to walk through this process and see how it unfolds step by step.
Step 1: Capturing the Point Cloud
The journey begins with a 3D laser scanner or a LiDAR-enabled drone that scans the building or site. The device emits laser beams and records their reflections to measure distances. The result is a dense point cloud dataset, showing the structure in millimeter-level accuracy.
Real-life case:
For a heritage building renovation project, survey teams placed laser scanners at multiple positions inside and outside the structure. Within a few days, they captured billions of points covering walls, floors, ceilings, façades, and even mechanical systems.
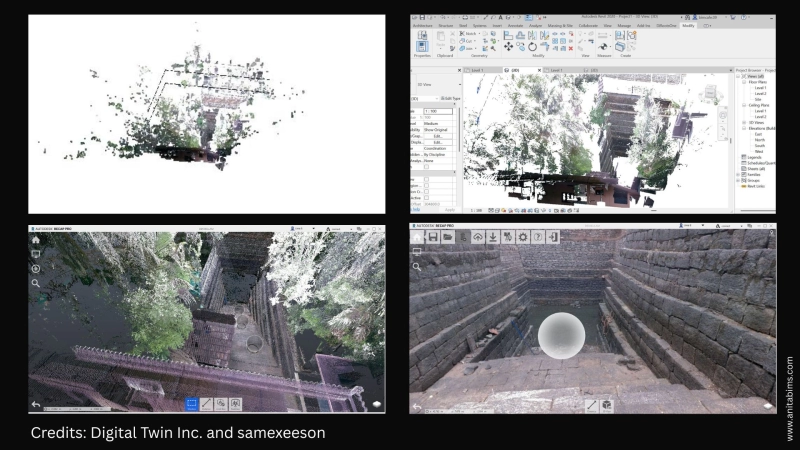
Raw scans from different positions are stitched together in specialized software like Leica Cyclone, Faro Scene, or Autodesk ReCap. This process is called registration, which ensures that all scans align in a single coordinate system.
After registration, unnecessary elements such as people, temporary scaffolding, or background noise are cleaned from the dataset.
Real-life case:
In our heritage building project, scaffolding around the façade created unwanted noise in the scan. These points were removed during the cleaning stage, leaving only the accurate geometry of the building.
Once cleaned, the point cloud is imported into BIM platforms like Autodesk Revit, ArchiCAD, or Bentley. The cloud acts as a reference layer to trace over while modeling.
Real-life case:
The point cloud of the heritage building was imported into Revit. The design team used it as a guide to begin creating architectural walls, doors, and roof systems with exact dimensions.
This is the most crucial stage: converting point cloud data into an intelligent 3D BIM model. Depending on project requirements, the model can range from a basic LOD (Level of Development) 200 to a highly detailed LOD 500.
Real-life case:
For the heritage project, the client requested LOD 400 to support both restoration and facility management. The final BIM model included not only the architectural geometry but also the structural and MEP components.
To ensure the BIM model matches the real-world conditions, clash detection and geometry verification are carried out. The model is overlaid with the point cloud to identify deviations.
Real-life case:
During validation, the team found that certain structural beams were tilted slightly due to aging that was not visible in old 2D drawings. This information helped engineers redesign strengthening measures without surprises during construction.
The final BIM model can serve multiple purposes depending on the project scope:
Real-life case:
For the heritage building, the BIM model was used by architects to plan restoration, by contractors to sequence activities, and by facility managers as a long-term maintenance record.

The Point Cloud to BIM process transforms the way we approach renovation and retrofit projects. By starting with precise laser scans and ending with a highly accurate BIM model, the workflow ensures smoother collaboration, fewer errors, and better decision-making.
Real life projects such as the renovation of a heritage building clearly show how powerful this process is in bridging the gap between existing conditions and future design. For professionals in the AEC industry, mastering Scan to BIM is no longer optional, it is becoming the standard. At Anita BIM Solutions, we not only help professionals stay updated with the latest BIM practices but also guide students to understand real-life applications like Point Cloud to BIM, preparing them for industry demands. For those who wish to keep up with current trends and build expertise in BIM, Anita BIM Solutions offers the right platform to learn and grow in this evolving field.